
Snake Rail Fences
I have been playing some "Rebels and Patriots" by Osprey wargames and am doing American Civil War in 1/72. When wargaimg actions in North America you need a lot of fencing to line your fields and roads, and plastic ones can be somewhat expensive and somewhat fragile. I decided to make some for myself.
 |
| Here is my first batch, about 57 inches. |
 |
| Some Union Cavalry seek cover behind a section. |
You will need:
PVA glue
Toothpicks (a lot of them)
MDF bases
Flush cutters
Plastic clothespins or twist ties
A drill with a bit same size as your toothpicks
Start by cutting a bunch of MDF bases and beveling the sides.
Drill a hole near one corner and then make a spot about 40mm near the other side. I made a jig so I could mark where the next hole would go.

Then drill where your marks are then drill another hole right beside it about 3mm away.

Place blobs of glue over your holes and insert a Toothpick into each hole.

Lay toothpicks flat between each pair of upright tooth picks with a generous dollop of glue, at each end of the fence place an extra toothpick that protrudes past the base edge, this is to keep your fence height the same as in the middle.

Pile 5 layers of toothpick, then clamp the uprights together I use both clothespin and twist ties.

 |
| I use these clothespins because the small hole that clamps the tooth picks very tightly. |
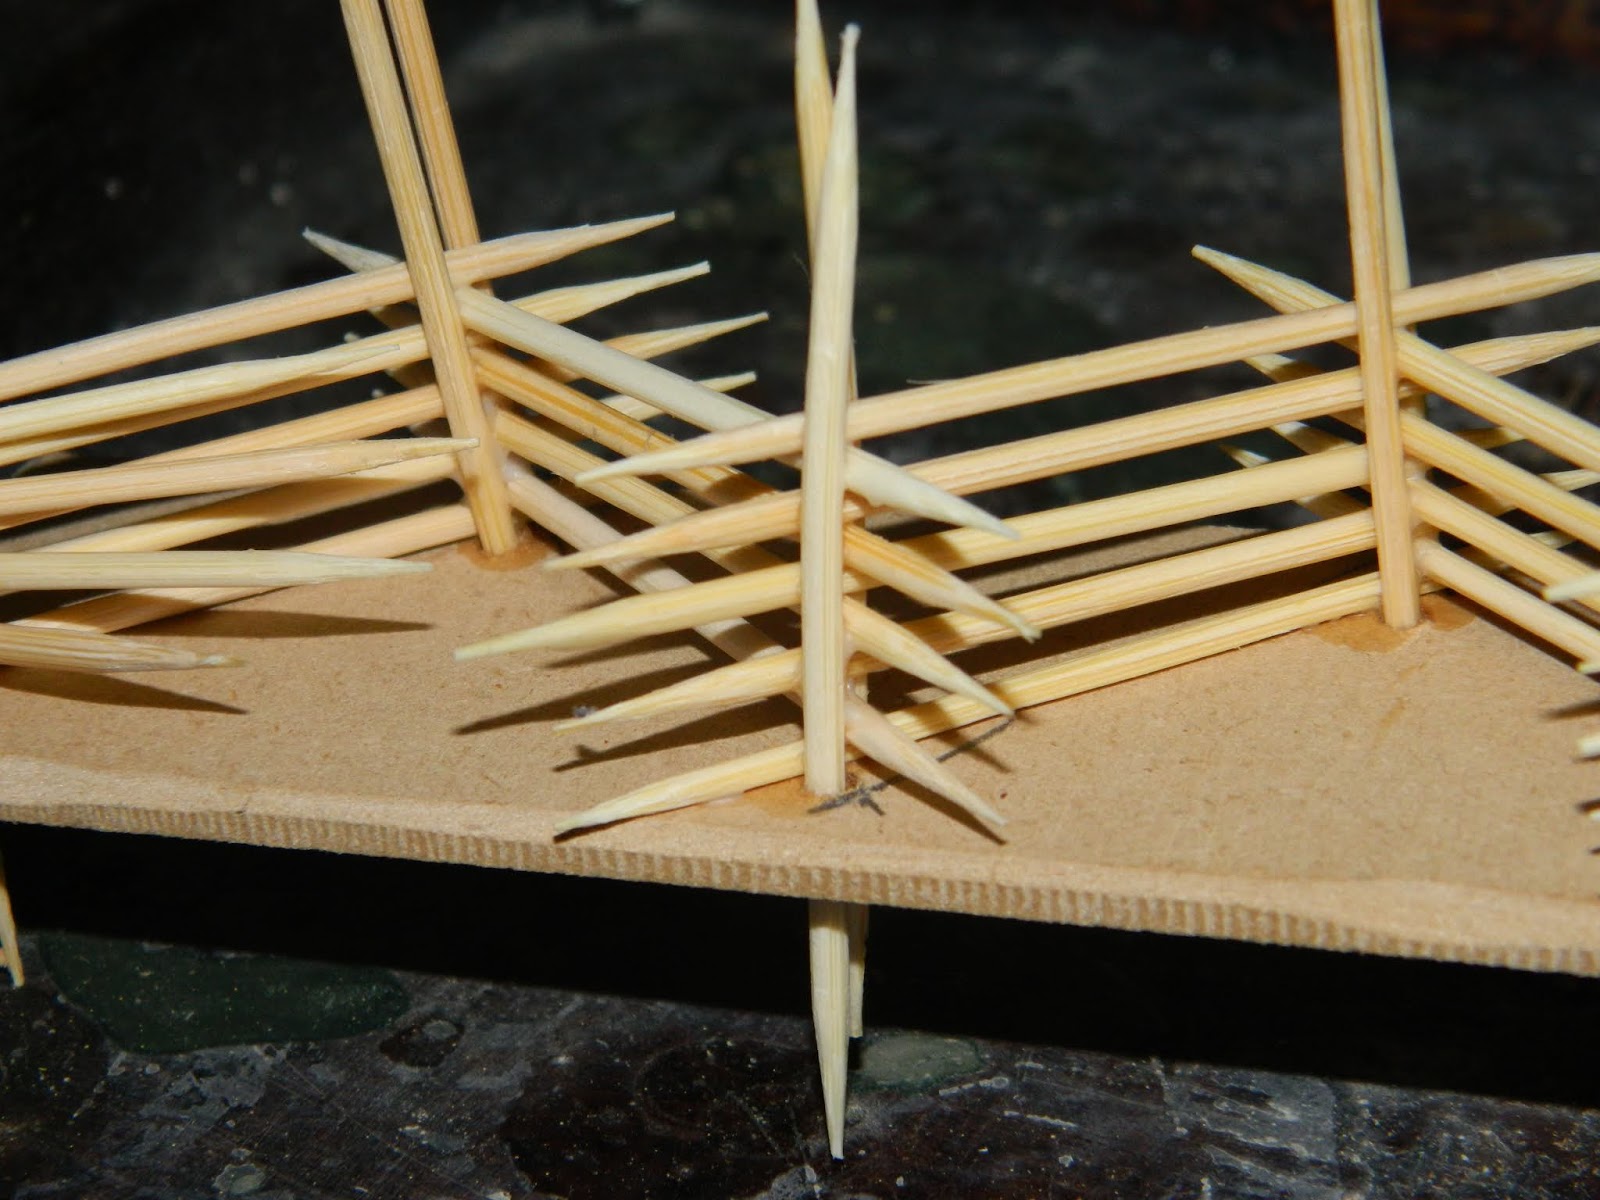
Get your flush cutters and cut off the ends of the toothpicks that extend past the upright (cut the end toothpicks as flush as possible with body of the fence) and above the top rail, make the cuts as ragged as possible for esthetic reasons. Then cut any toothpick that extends out the bottom of your base as flush as possible.


I cover the base in brown caulking then a coating of water diluted mod podge and while still wet sprinkle a mixture of sand, ballast and tile grout over the mod podge, then a another layer of diluted mod podge then drip a few drops of green and brown acrylic washes. When that is dry I dry brush the base with a bright yellow and add clumps of foliage.
Excellent tutorial! Thank you for that!
ReplyDeleteI've recently seen the blog of this game, who has done the exact same thing 😊:
https://20mmandthensome.blogspot.com/2019/03/so-this-happend.html?m=1
Thanks a lot for tutorial. Very helpful.
ReplyDelete