Showing posts with label Blucher. Show all posts

Friday, 21 January 2022

Virtual Battle of the Mincio River

 ACDC 2022 Battle of the Mincio River

   I realize it has been some time since my last post, but I am still wargaming, but with Covid and cataracts I have not been able to get many FTF games in, nor do much physical hobbying, (up close).

   Lately most of my hobbying time has been spent on a computer game called Tabletop Simulator, on which I partake in or run Virtual minature games.

   Last Sunday (16th January) I ran a game of Blucher for a digital convention called ACDC (Armchair Dragoons Digital Convention) 2022.

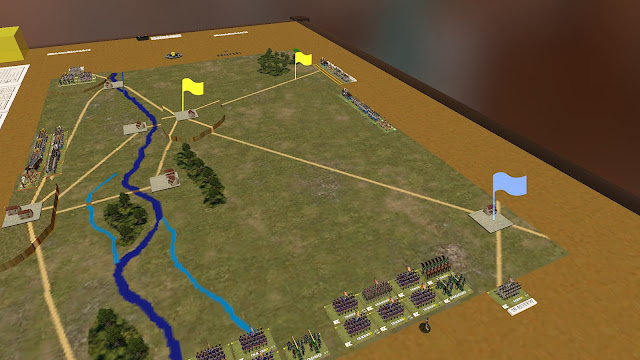
Here are few screen shots of the game.

Objectives and setup locations


Fight for the town of Valeggio.

Random draw had Tom playing the role of Eugene (the French), I was the Bellegadre (Austrian).

Tom player had never played Blucher before, but picked up the game pretty quickly.

It was a turn 25 (of 27) victory for the French, achieved by breaking Austrian Morale.

Friday, 3 March 2017

That's a lot of horse flesh

I didn't like the basing on my cavalry figures (4 on a 40mm x 20mm base), as they were. I was able to use about only half of what I have painted in my Blucher games (my preferred Napoleonic rule set) also 8 figures to a unit was somewhat anaemic looking. My first thought was re-base just some figures on 20mmx20mm bases and add make new cavalry sabot to hold the 60mmx 40mm cavalry units, then thought to my self why not just re-base them all on bases the same size as my infantry and I can then use my infantry sabot for both my cavalry and infantry units.

Here is the end result of 5 days.

All my painted cavalry.

British and Portuguese cavalry

Austrian cavalry

Finally the French cavalry

I still cant use it all though. When I originally started (with Napoleon's Battle) my main cavalry unit size was 16 figures and I am using just 12 for Blucher, but still looks better than 8.


Old based cavalry in cavalry sabot
New based cavalry in infantry sabot

Gratuitous close up
 While I was taking the pictures I decided to see if there is any difference in the quality of my painting. One of the units below I painted 25+ years ago and the other one a mere 2 years ago.


Monday, 6 February 2017

Better looking than an opaque cup

Inspired by a post on the Toy Soldiers for Old Gits blog here is my homage to his Dice Shako ... err shaker.

Where as TSOG made his out of PVC pipe, I went for more accessible and easier to work with components.

Needed:
Cardboard Mailing tube 2 1/2" diameter 2 feet long
Black Construction paper
Red Construction paper
White Glue
1 piece of Yellow Card stock
Thick card board (for the plug)
Cereal box card

Cut a 3" section of your mailing tube. I used a table saw.


Plug one end with cardboard or a circular base if you have one that fits and hot glue it in place.


Then glue, using PVA, a piece of cardboard from a cereal box or whatever over the top of your plug.
Hold it in place while the glue dries either a heavy book or clamps.
When dries trim it flush with the sides. Then glue black construction paper on the top trimming it flush with sides, then glue more black construction paper to the side of the Shako
Cut 10mm wide strips of red construction paper.
 Glue one red strip to the top and another to the bottom of the Shako.
 Now to make the Shako plate. I found a line drawing of one in a book, scanned it and printed it onto yellow card stock.
I then made a gold wash (didn't have a brass or copper paint) and painted over the printout of the Shako plate.
Which I then cut out and filled in the some of the spots with a Sharpie (i didn't want to try and cut out them).

Glue the Shako plate on (with white glue).
Then glued 4 more red construction paper strips, over where a wearers ears would be, in a slight V-shape.


Tuesday, 10 January 2017

A near run thing at HRGG

Last Saturday saw another Blucher game take place at the Hamilton Road Gaming Group, located in the Crouch Branch of the London Public Library.
The players were Cecil (Craufurd), Mike (Hill) Jordan (Ney) and I (Drouot)
A battle using two 305 point armies using the 100 days lists.

Both sides split their armies into 2 all infantry corps and an all cavalry corps. The British attached all eleven of their foot batteries to brigades, opting for the additional die when shooting, but massed their 3 horse batteries and attached it to the Cavalry corps. 

The French attached a cavalry brigade to each of their infantry corps and massed all their artillery into 2 Horse, 2 Heavy and 3 Foot units.

Both sides had an army morale of 6.

The British set up with their cavalry on their right, Craufurd's corps on the hill and Hill's corps behind the woods on the British Left.
The French set up their cavalry corps on their Left, I Corps with Drouot attached in the middle and Ney's II corps on the right.
Stars represent the objectives
Ney sent II corps forward over the hill at Hill. French I corps occupies the village and sends 3 more brigades forward to fix in place (and reveal) the British on the hill.

The entire British cavalry corps races into the center to threaten Ney's open flank, its horse battery opens fire and scores 3 hits.
II corps advances on the far side of the stream and the British cavalry rushes to threaten their flank. in the foreground French Heavy artillery opens fire on Craufurd's troops.
The French heavy batteries open fire on the British on the hill, causing some casualties, the French Cavalry corps waits in reserve.

Ney's lead brigade takes 2 more hits from the British Horse battery (they are down to 1 elan), Ney Swoops in to rally them, does and dies! (it's turn 5).
The death of Ney
Hill and Ney exchange fire for a few turns, with II corps coming off worse. Its actions only manage to fatigue only 1 British brigade, which cravenly retires. At one point Ney's successor got his cavalry behind the Hill's front line and charged a unit in the rear, with an infantry brigade flanking it as well, but was unable to break it, and the cavalry ended up retreating off the opponents table edge (counting as broken).

French I corps engages in a firefight with the Craufurd's troops on the hill, while Ney's successor fights both Hill's II corps and the British cavalry corps.

Ney's corps eventually gets ground up having 4 units Broken (counting the cavalry that left the table) and many units sitting at 2 or 3 elan, but drawing all the enemy cavalry to the far side of the battlefield, at which point the French cavalry corps goes into action, moving onto the flank of Craufurd's corps, which forms squares, and the French Artillery gets to work softening them up and cavalry charge them, quickly breaking 5 units in three turns.

On the far side of the British cavalry make another attempt to break some of Ney's troops but a series of bad rolls for the British see no French units lose a single combat.

Both side are sitting at 5 units broken.

Craufurd's surviving brigade falls back towards the Northern ford, looking to join with Hill, but a French cavalry brigade forces them to square. Five French batteries open fire on him, the first 4 (15 or so dice) and do a total of 1 hit, then a horse battery, barely in range, open fires with 4 dice and gets 3 hits (three 6's and a 2) breaking him.
The open spot just in front of the French Cavalry is where Craufurd's last brigade was destroyed by the fire of 5 massed batteries.
The British army has 6 units broken (in Blucher at the end of each turn victory is checked by asking is your army Broken?), so they regardless of what they do they have lost but as the French are one unit away from breaking themselves, we decided if the British can break a French unit they will get a draw. They launch 3 Brigades of cavalry at 2 French infantry brigades (a slim chance, but a chance) the French are in squares. The don't break either one and the game ends with a French Victory.
British cavalry preparing for their last ditch attempt to deny a victory to the much detested French.
Result: Crafurd's Corps was completely destroyed, Hill's corps had 2 units retire and a bunch of casualties (General Hill died trying to unsuccessfully inspire his troops), Ney died and 5 of his Brigades followed him. Drouot did little, except attach himself to THE Horse Battery and claims it was him laying the guns that resulted in its exceptional last shot.

22 turns.
4 1/2 hours
4 Players (2 of which had never played Blucher before).

Sunday, 31 July 2016

Blucher Battle of Frischbach

The Battle of Frischbach, Southern Germany 1809, a Battle between France and her Allies vs. Austria. A fictional battle using the Blucher rules.

July 24th I ran a game for my local gaming group. When I was designing the scenario I was expecting 4 players, so I decided to use the coalition rules and each player would run a separate army. So of course 6 players showed up, which required I do a bit of on the fly adjustments, which mostly worked out well.

This game saw the first official use of my DIY battle mat.

Rather than spend a lot of time thinking of army lists, I used my force cards and drew two 200 points Austrian forces and two 250 point French forces. I actually (just) had more than enough painted units to do it (I had to proxy some French ally units, with actual French units) for a total of 37 French & Allied units and 33 Austrian units. Each army was 4 corps. Due to the cards I used to create the armies both sides were very short on cavalry, 6 per side and while the Austrians had more guns than the French, they opted to attach most of them to infantry units (as they were defending), they only had 1 massed horse battery, whereas the French had 4 massed foot batteries.

I used the Scharnhorst maps to choose a battle area, a couple of die rolls saw me using the South Germany maps with the battle centered around D3/E3. I added a road and village in D4.


The scenario was; the Austrians are defending and if the French didn't break the Austrian army's morale or capture both objectives the Austrians would win.

This was only the second game in which I used my Concealing boxes to show units in reserve, see Blinds Box Tutorial for additional info on them.
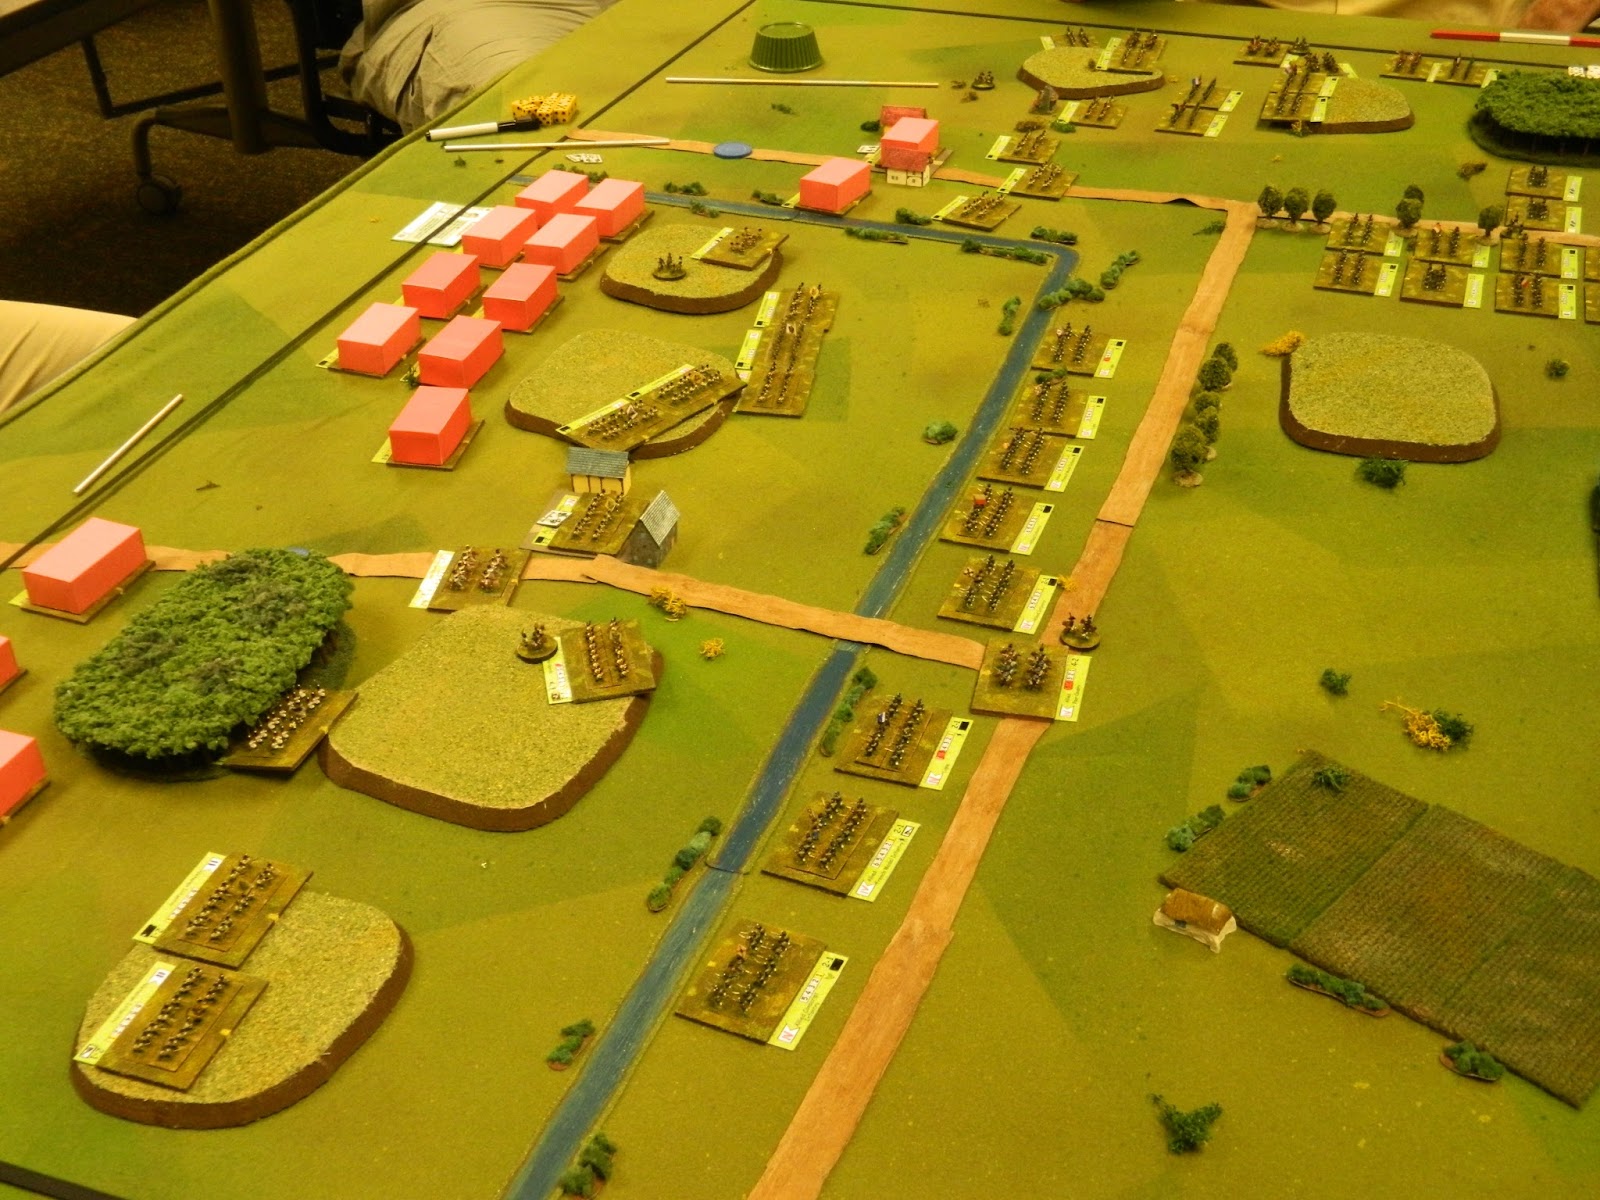
Setup locations French on the Right, under the Blue boxes, consider that one red box a blue box.

The Austrians deployed 3 of their 4 corps behind the stream, not realizing they couldn't use their reserve move and cross over the stream. (I guess I didn't explain it well enough)

Opening moves, the French send forward almost 2 entire corps against the lone Austrian corps.


The IV French corps, (which is mostly made of the allied units) moves to the stream and threatens to cross. The last French corps (the III) stays in reserve .


The Austrians realizing how exposed they are on their Left try to race their III Armee Korps to help.

a bit of skirmishing across the stream.

French reserves waiting for an opening.


Austrian I Armee Korps grimly holding on, the French II Corps prepares to assault the area around the village of Frischbach.

With the Austrians having little or no reserves uncommitted the French reserve launches it attack on the the Austrian center.


The fighting around Frischbach is very bloody


Fierce fighting on both sides of the stream near Frischbach.


The fighting around Frischbach dies down. The Austrians army on this side has broken and these French are beat up somewhat.

French reserves rupture the Austrian line in multiple places

The Austrian players concede the game after one wing is broken, the second Austrian wing was still in pretty good shape, but both French armies were still combat effective, albeit the I and II corps were brittle, and the French III corps had just punched 2 holes in the Austrian line

A great game and a good time had by all players. 8 Corps hammered away at each other for 5 hours and we reached an actual conclusion, as opposed to the usual "X side would have probably lost".